Tuesday, 28 February 2012

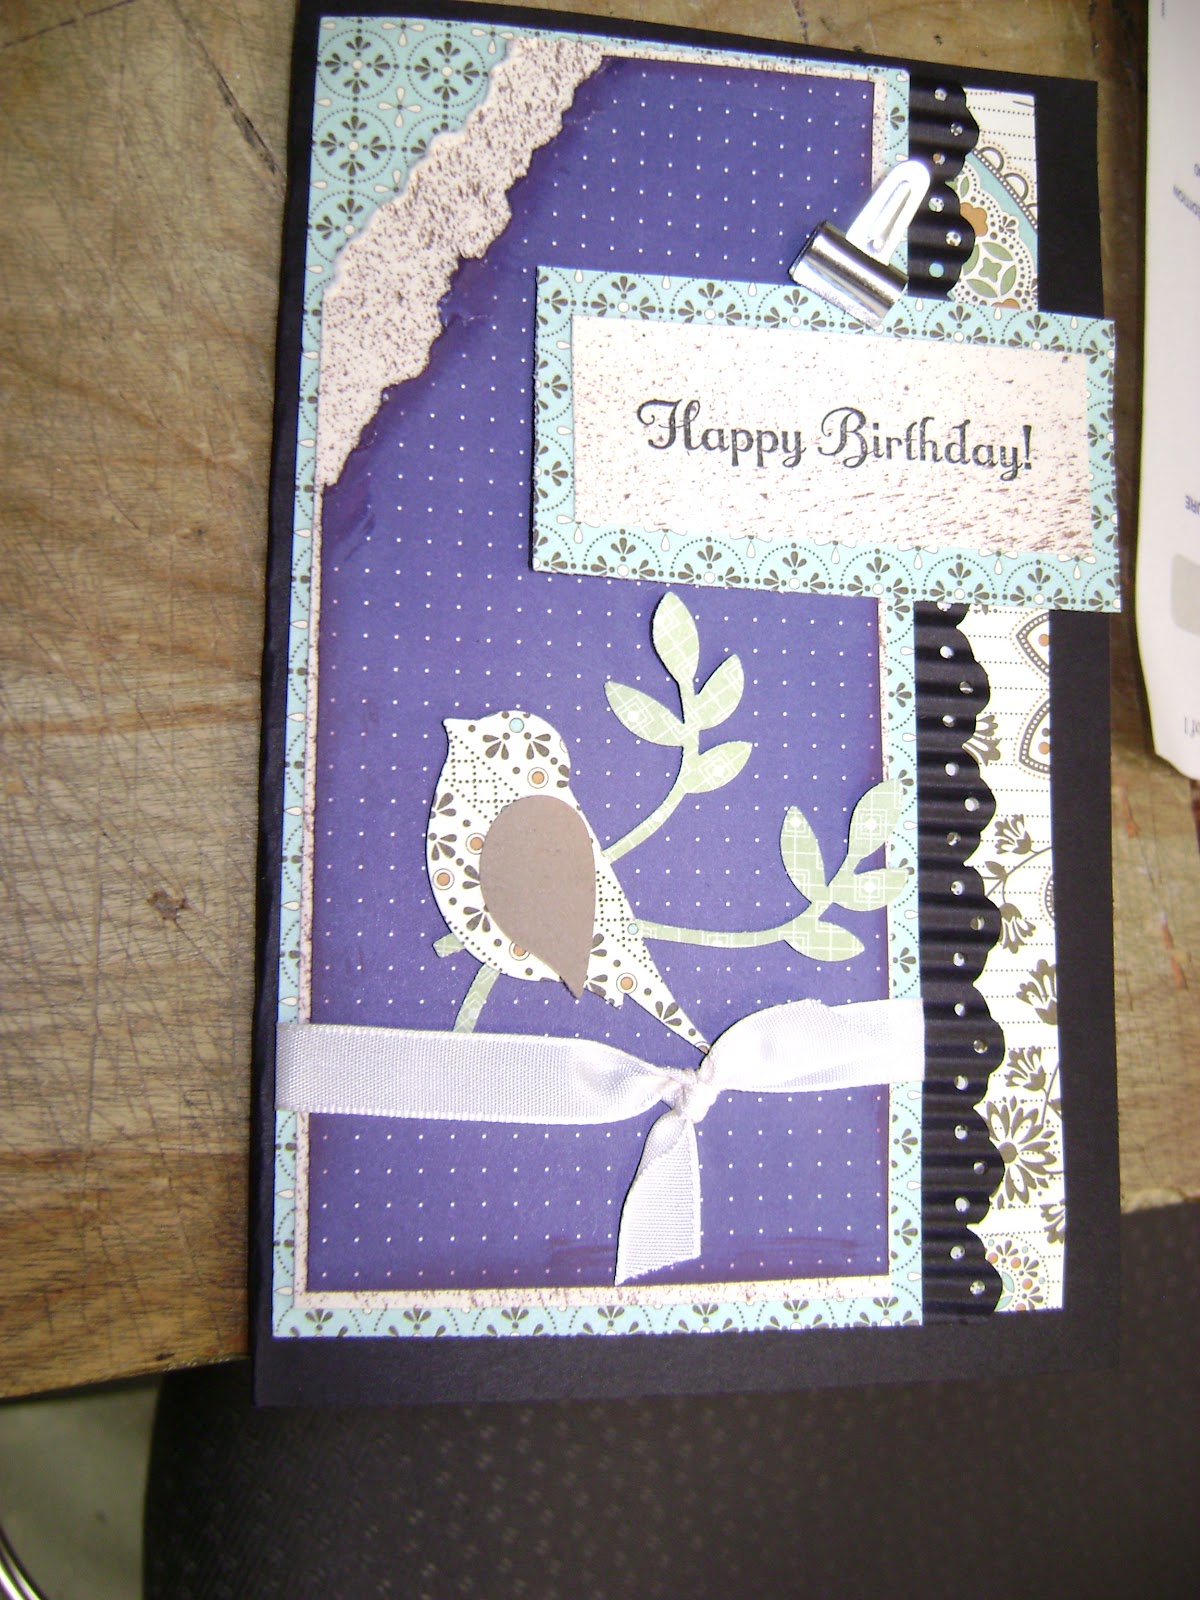
SUO #39 Happy Birthday 2nd entry


Hi All,


I entered two cards at one of the recent SUO challenges so I figure that it must be okay! Last night, I started making a wonderful card at my friend Beth's house. I borrowed her SU bird punch and began punching out birds on some Spice Cake DSP in my scrap pile. It feel great to use up some more of my scraps. Instead of giving you a long blow by blow of how I made the card. I will just put the supplies down and the pic and give a fuller description later as my hubby is coming home soon from facilitating a small group and I do want to get at least a little cleaning done! SO here are the pics. One pic was done closer up and in better light than the other pic and you can see the purple SU DSP better behind the bird. I smudged the edges on the purple background with bravo burgundy so if you look close you will see the color difference on the close up of the card.


Supplies:

Embellishments:
Crimper to crimp black cardstock and Eyelet Border Punch
 1 Mini Library Clip
3/8 inch Very Vanilla Taffeta RibboPaper:
Black & Vanilla Cardstock (Vanilla was sprayed with log cabin smooch spritz)
Spice Cake SU DSP (Designer Series Paper
1  purple sheet from a small stack of demo paper I got from my demo. Used part of one of the green pages for the leaves.
Used Bird punch to punch out the bird and leaves

Stamp Set: Something to Celebrate. Used the "Happy Birthday" in classic black ink.

Hope you love this card as much as I do. Happy Stampin~

Monday, 27 February 2012

SUO Challenge #39 Happy Birthday!

Hi All,

I gave away a birthday card on saturday so I went about making a new one! Wouldn't want to be without a card! Anyways, I decided to enter it into the SUO #39 Challenge.


 I used a cool technique with my SU medallion stamp. I scored my white cardstock with my SU Simply Scored Scoring tool at 1 inch intervals and then inked up my stamp with Always Artichole and then stamped. After that I brayered over with versamark and heated it and finally used my clear powder on it and then heated it with my heat tool! I saw this technique at a SU workshop and on split coast stampers so I thought I might try it. Really loving my brayer lately! I popped a green glimmer brad in the middle and stamped Happy Birthday from the "Something to Celebrate" set in the lower right corner of the medallion image. On the left side I used rich razzleberry ribbon from my old stash of SU ribbon and popped up that new blushing bride ribbon from the mini catty. After I made the main panel I popped it up on the green DSP with dimensionals The green DSP in the background is from a SU assorted paper stack and the DSP on the right side just under the edge is from the Spice Cake DSP. I punched the scallop border with my punchand created a little peak through window as I didn't punch all the way. Wanted to layer some beautiful SU cardstock underneath to balance off the pink ribbon on the other side. All of this was mounted on black cardstock and the base of the card is white cardstock. I enjoyed making this card and hope you enjoy it too! ~Happy Stampin!~

Friday, 17 February 2012

SUO #38 Valentine with Two Colours Card #2

Hi All,
I was just playing in my home studio tonight and made a card that I realized would work for the SUO #38 challenge this week. I have already entered one card and am not sure if it is ok to enter a second card, but who goes....I guess I will find out!  My two colours and Regal Rose and Blushing Bride.

Anyways, I pressed out the Manhattan Flower on more leftover shimmer paper from christmas and then flipped it over and brayered it with Regal Rose classic ink. Then I cut out the flower and popped it up on dimensionals on blushing bride paper. I had some leftover white cardstock that I had brayed over using the fancy fan plate so I used the Boho Punch to punch out the little flowers and put a pearl in the middle. The white scalloped edged heart was pressed out a while ago (another leftover). I stamped the sentiment "Key to my Heart" in cherry cobbler from the You're a Gem set and brushed the sides with the blender pen like I did with the cupid heart in my first card for this challenge. The cute ribbon is Very Vanilla Seam binding. I hope you enjoy this card that just happened from the various leftovers in the tray on my desk! I just love it!

Tuesday, 7 February 2012

SUO #38 Challenge: Valentine's Day Card with Two Colours

Hi All,
After my challenge last friday/saturday in posting a card to the SUO #37 Challenge, I decided to make my card earlier and submit it earlier so that I won't have any last minute linky tool frustration! I love the SUO challenge blog! I did mange to submit my card to the Stamping Royalty #109 challenge so that was awesome.

The card I made today for the SUO #38 challenge was such fun to make. My new stuff from the mini catty came in so I immediately went to PLAY! I decided my two colours would be cherry cobbler and blushing bride and went to work. On white cardstock, I took the larger doily from the "Delicate Doily" set and stamped it in classic black in the middle of the cardstock. Since my black classic ink was out already, I stamped the "love you" in the corner of the cardstock from my new "ps. I love you set". I stamped my cupid from that set on the shimmery white SU cardstock I had left over from my Christmas cards, and covered it in dazzling details. When dry I punched it with my heart shaped SU punch. I took out my cherry cobbler ink pad and one of my blender pens and coloured in the edges of the heart with more cherry cobbler ink. I pressed out the large paper doily with my new large doily die I ordered from the mini, and spent some time punching out all the little bits. When done, I placed an antique brad in the middle, and twisted some cherry cobbler twine around the brad and left the twine long. I stamped out the "I love the u in us" in cherry cobbler on more left over shimmery cardstock then punched it out on the large oval, took my cropadile and set a small eyelet and then took the long ends of the twine through and tied them. Then I cut off the excess twine, and placed a stamping dimensional on the back of the large doily and gently placed it over the centre of the Delicate Doily I stamped in the middle of the card. I took my border punch and punched out the lacy detail on the bottom of the card. After that I used some snail and stuck on some 5/8 victoria lace ribbon and on top of that some of that fabulous blushing bride pleated satin ribbon! I cut out a cherry cobbler piece to go behind my card front and then adhered it using dimensionals, and then placed it on the card backing also using dimensionals. I think this card has flair, pop, fun and colour even if I only used two colours. Hope you enjoy my latest creation! Happy Stampin~

Saturday, 4 February 2012

SUO #37 & Stamping Royalty #109 Challenge Entries

Hi Everyone,

Valentines' Day is approaching so I made a funky, vintage V-Day card for my hubby. I mainly made the card for the SUO #37 Challenge but had trouble linking it to the collection so I looked around and saw that Stampin Royalty had a Valentine's Day Card Challenge too so I entered that one as well. Still hoping that I can enter the SUO #37 challenge though but it looks like the collection is closed.

Anyways, let me tell you more about my cool card! One of my favourite items from the new mini is the new ribbon so I am showcasing a piece of that wonderful Blushing Bride Ribbon over the cherry cobbler seam ribbon.  My other favourite is the Blushing Bride smooch spritz but you can't see it well because I sprayed it onto the vellum flowers I cut with my 1 3/4 circle punch. I made six layers and was going to use crystal effects on them but then realized I had run out! :(

Anyways, I crinkled up the vellum cut outs and then pressed them onto a cherry cobbler ink pad and then sprayed them with blushing bride and then log cabin smooch spritz. I left it to dry while I was at work....A red glimmer brad from the brights collection fit nicely in the middle! On the Velum layer I used some snail and put on a layer with a cherry cobbler border pressed out with my SU scallop border punch with red dazzling details on the scallop parts...not sure if it shows up well in the pics though!

There are 3 layers to this card: my main layer spritzed with log cabin spritz. The second layer is one of torn vellum sponged with cherry cobbler ink and the last layer is torn with the tearing edge, sponged with cherry cobbler ink on the ragged edges and then spritzed with blushing bride spritz.

In the top left hand corner I stamped the "hugs and kisses" from the All Holidays SU set and then highlighted it with a beveled window pain held on by cherry cobbler seam binding and held together with adorable SU brads, but I forget if they were the ice set or the fire one...anyways I just LOVE them! I used the Valentine stamp from the "Holiday Best" stamp and masked off the "(please be mine)" part of the stamp. I used dazzling details on the thick side of the V in valentine and then coloured in the flowers with a marker. I am waiting for the "ps I love You" stamp set to arrive and was going to stamp in that adorable "Love you" stamp but since I it hasn't arrived I went with the Valentine greeting instead! The cherry cobbler butterfly, filled with red dazzling details and the black pearl set off the card so nicely in the corner! (Not sure if the black pearl is SU or not though...) The inside of the card is spritzed with log cabin smooch spritz and has the V from the Serif Alphabet set. I hope you enjoy looking at this card. I had SO much fun making this card and I think it will amaze my hubby on V-Day!! 

Happy Stampin'

Saturday, 14 January 2012

SUO Challenge #36 New Techniques: Stand Up Birthday Card with Glitter

I have just been having so much fun playing around with a new technique: making a stand up card/pop up card filled with wonderful sentiments and awesome embellishments! I learned the technique at Kari's and made a wedding "Congratulations" card! It is just so fabulous that I have it on the credenza in my front hallway along with a stand up photo album and the wedding guest book. It makes such a cute display! And the photo flips so a new photo can be on display at any time!


Anyways, I modified Kari's original card design to make a fabulous card for my Sister-in-Law's birthday! The party is tonight and I am going to have a quick wash up to get all the glitter off of me, but I just had to post these pics! The paper is black card stock scored exactly in the middle and then 5/8 on each side of the centre line then score it into the shape you are looking for. It's not too hard. I used tombow to glue a black square to the back so I could place my fun flowers. The edges are brushed in SU glitter glue and I used their Melon Mambo ink...just so fabulous. The black and striped paper is from MDS. The T on the back is for her name "Tanya" and the stamp behind it is from the Upsy Daisy set! Birthday Wishes is from the Occasional Quotes set.  I wrapped the gift in matching MDS paper and used a tag stamp from a retired SU set....I just love that cute Make a Wish tag! I will post more after the party but I must go! Cheers! Happy Stampin'!

Wednesday, 28 December 2011

SUO Challenge #35

Hi all,

It has been a long time since I last posted anything because I was getting ready for Christmas, then cooking for my family at Christmas, then visiting in-laws for Christmas and Boxing Day and just yesterday finally cleaning up from Christmas. It was such a fun time though and today I found time to do up a card!
The SUO Challenge is a punch challenge so I used my 5 petal punch, my 2 inch circle punch, and my 1 3/8 scallop punch! I loved using my new Simply Scoring tool to do the scoring on this side easel card!! I think the ribbon was Certainly Celery and the designer paper was an SU pad from a little while ago. The stamp was from the set "Occasional Quotes". I hope you like this card as much as I do! The paper behind the scallop shape is paper from MDS on a disk called "Savour the Season". It is my hope that all of you are savouring the season and enjoying a special time with family and friends! Merry Christmas and Happy New Year!

Sunday, 20 November 2011

Just a few Christmas Cards!

Hi All,

I am starting to make Christmas ornaments, and cards and thought I would share a few pictures with you! It has been so busy lately but so wonderful to sit down and start playing with paper! I made this card for my friend Pinky! I think it is so cute! The second card below was obviously for one of my American friends...I love the new SU "Sounding Joy set and so used the big star stamp as the main stamp for this lovely card!


The last card is so cute and is the master card for a bunch of cards I am making for friends! The image is from the Pines & Pointsettias set! I love this stamp as well as the one of the little pinecone. The whole set is adorable! I will spend some extra time making more complicated cards for family so I will post those in the coming days!   ~Happy Stampin!~

Saturday, 5 November 2011

So Shelli Christmas Card Challenge


I have found a Christmas Card Challenge to submit my cute easel card to, and it appears to be the actual blog of Shelli from Stampin' Up fame! This is exciting! It is a cute easel card I made with white cardstock and a top note die cut in half for the bottom panel. I adhered some 5/8 Victoria Trim with some stick strip and stamped the sentiment "Enjoy" from the You're a Gem stamp set! The tag is tied on with red/white twine I bought in the summer from the Summer Mini catty! On the front panel of the card I used two elements from the "Bliss" set: the pointsettia looking flower, and the chandelier looking element underneath it. I used Always Artichoke and Cherry Cobbler ink. The Merry Christmas is from a 2pc Stampin' Up set I bought quite a while ago and forgot the name of....the itty bitty buttons are from the brights and the thin brown ribbon is the 1/4" Early Espresso grosgain ribbon! The DSP was given to me by my demo at a card making party where we made some other cards so I actually am not sure which DSP (Designer Series Paper) set it came from....I love this little easel card! It is just so cute!

~Happy Stampin'~

SUO Challenge #31: Thinking of You!

It's been a while since I have blogged but full time work, family, and friends have all filled my time up! Now, I am home relaxing with no plans so I decided to make some cards! It feels so great to just relax~at last!

Last night before bed, I made an adorable easel card with a Christmas theme so I think I will submit it to a challenge...need to look at the various challenges out there now! This morning I made another easel card with a Thinking of You theme and saw that SUO was having a challenge on Thinking of You cards so I thought I would submit it!

On a base of white cardstock, I made the front panel for the easel card and the base of the easel card using a DSP (Designer Series Paper) in Rich Razzleberry (forget the name of that paper~ ooops!) and  for the popped out bee on the front of the card I  used SU Botanical Designs DSP. On the base, I cut out the top note die and sliced it in half and used 5/8 Victoria Trim all bunched up and secured with sticky strip. I put a piece of the rich razzleberry paper on the top of the sliced Top Note shape and used my SU Scalloped Border punch to punch out a fun shape on the top. I tied a cute sentiment from the You're a Gem stamp set. On the front, of the card I used Bravo Burgundy ink to stamp out the flowers from the Upsy Daisy Set and the sentiment " Thinking of You" from the sale-a-bration "So Happy For You" set. My favourite part of the card is the cut out bee! Anyways, I think this easel card is a lovely way to say "I am Thinking Of You!" Hope you enjoy it! ~Happy Stampin'!

Saturday, 8 October 2011

SUO Challenge #29 Leaves


I have just finished making all the little treat boxes for Thanksgiving Dinner at my Sister-In-Law's place on monday and thought you would all love to see them. I used the Sizzix take out box die and pressed out and adorned 7 little take out boxes. Inside I placed some yummy, special treats for everyone! Most of the boxes are an pressed from an Early Espresso textured paper but not all as I didn't have enough!  The ribbon around the boxes is Su Grosgrain Ribbon Striped 1 1/4 inches in Early Espresso!On most of the boxes, I used Crumb Cake to stamp out the leaf from the SU "Day of Gratitude" stamp set and Basic Black to stamp out the sentiment from the same set. It is simple but nice and I think will make a great treat and a beautiful part of the table setting! Since the leaf was from the "Day of Gratitude" set I decided to enter it as a 3-D item in the SUO #29 Challenge Leaves! Hope you all have a wonderful Thanksgiving! ~Happy Stamping!~

Saturday, 1 October 2011

World Card Making Day: October 1, 2011

Hi Ladies,

I have been making birthday plans and surprises for my hubby's birthday on Sunday Oct.2, and part of the fun was making these adorable little treat boxes! The first picture is a little blurry, but the second pic is of the finished treat boxes and it is much clearer! I am planning on filling them with either fine chocolate from Charlie's Chocolate Factory or with little cheesecakes....

In the first pic, the treat boxes are not fully embellished. I used SU (Stampin Up) cardstock and DSP (Designer Series Paper) with my Sizzix pie box die. The sentiment "Friend" is from the SU "You're a Gem" set and the "Happy Birthday" was from the SU Pretty Postage set. The postage stamp shape was cut out from my postage stamp SU punch. The ribbon is also from SU...their scallop ribbon...hard to see in the pics becasue it is on the side of the box! The second pic is of the finished treat boxes! Can't wait for the party tomorrow! Glad that I am all ready for my hubby's special day!  What are you up to on World Card Making Day? Leave a comment and let me know! ~Happy Stampin'~

Tuesday, 27 September 2011

Look at what we made at Kari's!


I had such a fun time last night at a workshop at Kari M's place after work. She took us through a tutorial on Splitcoast Stampers on making a Hallowe'en Treat Box with Card. I brought it to work to show all my friends and one of my customers took a picture of it! I spent time trying to fit different sizes of gum and candy in the gift box. We did make another card but I just loved making this project. Thank you Kari! If any of you want to see Kari's work just look at her blog on the right hand side of my page. Her blog's name is Vancouver Stamping Grounds! Check it out and you will be amazed!

Wednesday, 21 September 2011

SUO Challenges #28 Fall Colours


Hi All,

I was inspired this morning by my Cajun Craze ink and my Chocolate Chip craft ink, and my SU "Holiday Best" stamp set! When I saw the online challenge on"Fall Colours" for SUO I was excited, and quickly started to make this card before going to work. I just finished it a couple of minutes ago after a tasty roast beef dinner with my hubby!
On white card stock, I stamped my sentiment "Give Thanks" from "Holiday Best" with my Cajun Craze ink. Then I stamped my image using the Chandlier like stamp from the SU "Bliss" set. I used my Chocolate Chip craft ink then I used my heat tool and heat and stick powder ( which had a few flecks of  SU silver glitter in it from another project...oops!). I then used my heat tool and heated up clear embossing powder on the image to get a lovely look! I put one of the glimmer brads from the Brights Collection in the middle to jazz it up a little more.
On the left hand side, I used some of my Victoria Crochet Trimto make a fun ribbon and used tombow to glue on a neutrals button from my SU neutral buttons and put a darling little pearl in the middle. I used my Beautiful Wings embosslit to cut out those little butterflies in the right hand corner. I sponged some Cajun Craze on the butterfly underneath and put another little black pearl on the smaller white butterfly. The orange and light brown layers underneath are some SU DSP (Designer Series Paper) on a card made from textured card stock. On the inside, I stamped the daisies from the set "Upsy Daisy" in Cajun craze. I lightly put the ink on to get a slightly faded look. I hope that all of you love this card just as much as I do. I know I have made a great card when I want to keep it just for ME! There are just some cards that are hard to even think of giving away, but in the end I do! Hope you all have a great week. Happy Stampin'

Sunday, 18 September 2011

Stamping 411 Sat Sketch Challenge #221

Hi All,


This week went by so fast because it was so busy! Eventhough it was hectic, I had time to make a card for a Stamping Royalty Challenge and then made this card for the Stamping 411 Challenge! I decided to create a new Thank You card using my Music Notes Stampin' Up Wheel and my new set of SU Neutral craft inks! I had so much fun. I used some SU paper kicking around in my scrap pile and used a fresh green sheet from my SU DSP (Designer Series Paper) called Designer Series Paper Patterns Pack- In Colour. It's a 6x6 book of patterned paper with 60 sheets with 12 sheets of each five colours! Very cool indeed! My sentiment is from the Hodgepodge Happiness set which I think may be retired, but I am not sure about that! I used one of my neutral buttons with a littlest butterfly from my Beautiful Wings Embosslit! So cute! A little black pearl in the middle of the butterfly completes my card. I used my Tearing Edge to tear up the edges and rubbed the edges of each layer with craft ink to get that distressed look. I think it is a nice card to give to either a man or a woman! Happy Stampin'

Thursday, 15 September 2011

Stampin' Royalty #89 Challenge

Hello Ladies,
Had a little time before work today and I JUST had to make this cute card for the Stampin' Royalty Challenge #89! Haven't used my SU Texture Plates a lot lately so it was lots of fun to play with them again! When I think of cupcakes I think of parties and birthdays and fun! Hope you like this card inspired by the Stampin' Royalty picture! I know I do! Happy Stampin'!

Wednesday, 7 September 2011

SUO Challenge #27

Hello Ladies,

I just LOVE Stamping Up products!! I am not a demo (yet!) but might become a demo one day! You just never know! Anyways, I was cruising around looking for Online Challenges and found a new cool card challenge! ( Well, a new to me card challenge!) I love challenges as they always get me to refine my skills and get me to think outside of the box! Anyways, I hope you all enjoy this clean and simple card...I have sent various versions of it out to a few of my friends and everyone just LOVES it! I love the beautiful white ribbon so much. Since this challenge is a ribbon challenge I just had to submit my card. Enjoy & Happy Stamping!

Wedding Card!

It's been a busy time getting ready for school and work! I am going to a wedding on Friday September 9 so I HAD to make a cute wedding card. Clean & Simple & Classy! Hope you enjoy!

Wednesday, 24 August 2011

Stampin' Royalty Challenge SR# 86 Gift Box With Rhinestone Buckle


Hi All,
I made this box on August 12 just because I am in love with bling, and I gave it to my next door neighbour and friend who is a Stampin' Up Demo Beth! The full instructions on how to make it and the SU materials I used are on my August 12 post. I bought 24 rhinestone buckles at a local craft shop "Making Memories" so perhaps all of you will have to scour the craft shops in your hometowns to find this little gem of an item!
What girl wouldn't want an SU Demo as a neighbour? Instead of borrowing a cup of sugar I ask to borrow an embosslit or a sizzlit! We have such girlie fun! Beth was also the bridesmaid for my wedding so we have a wonderful history of friendship. Needless to say, I was infected with crafting inspiration and then made another gift box with buckle for my friend Sherry and one of my friend Kari. She is another SU Demo who has classes I attend.....I LOVE this box, and trust that this will inspire you to create some lovely cards, pages and 3D items with bling! To make the basic box just start with a stiff bristol board or a firm card stock. If you want a 5 inch box (14.5cm)then measure and cut out a 6x6 (15.5cm) square shape and score each edge at the 1 (2.5 cm) inch mark and it will look like a 6x6 square with score marks 1 inch all around. Each corner will look like a littler square so snip the little square where the vertical score marks intersect. Fold everything in and glue with tombow then make another box scored shy of the 1 inch mark so you can make a lid that fits. You can make a snugger or looser lid if you score closer or further to the 1 inch mark. I use tombow glue because glue dots and adhesive tape only hold for a short while. Check my August 12 post for more details on how I made this box! Love you all! Happy crafting!