Wednesday, 27 February 2013

SR #165 Sketch Challenge

Hi All,

Here is my entry for Stamping Royalty#165! Still rushed so I will post just the basics like on the entry for SUO #65!

Paper: Pear Pizza, Whisper White & SU DSP

Ink: Always Artichoke

Tools: Finishing Touches framelits
           SU Large Oval Punch
           Two SU Pearls
           Sentimental Stamp Set (Finally arrived yesterday!)
           SU Vanilla 5/8 flower trim

~Happy Stampin'~  Jenny G


Suo #65 Going Green

Hi All,

Here is my entry for the SUO #65 Going Green Challenge! Since I am a little rushed for time today I won't give the full description of how I made the card but just the items I used for this card! Here is the recipe! Everything is from Stampin' Up of course!

Paper:
Whisper White (background paper & little doily under the buttons done with SU triple doily punch) Pear Pizzaz (large paper doily sizzlit & little leaves sizzlit & card back behind whisper white with fancy fan)
Patio Party DSP (flower made from SU Rosette Die)

Ink:
Always Artichoke Classic Ink: edging around little doily, rolled with brayer over fancy fan, ink used for Apothcary Accents stamp.

Early Espresso Marker: I stamped the sentiment again and cut out the middle part to place over the rest of the stamp already stamped in Always Artichoke.

Tools:
Fancy Fan Impressions Folder
Large Paper Doily Sizzlit
Little Leaves Sizzlit
Su Big Z Rosette Die
Triple Doily Punch
Apothcary Accents stamp set and matching framelit
Two SU Pearls
Two SU Buttons

Hope you enjoy! ~Happy Stampin' ~

Jenny G

Saturday, 16 February 2013

SUO #64 Sale-a-Bration Time

Hi All,

I had a wonderful time with my friends Heather and Sherry yesterday creating cards and it got my creativity flowing! When I got home I started a new card: the card you see today on my blog. I took some SU whisper white paper and ran it through the Big Shot with that wonderful edgelit from my "Finishing Touches" set and then I ran it through again with the lacy brocade folder. I thought I saw the lacy brocade folder used in the sale-a-bration catty so thus my entry fits the competition. If not, and it is disqualified then that's ok as I think it is a STUNNING card which I wanted to share with you all anyway! If any of you want to case it just reference me as the creator or direct people to my blog. After I embossed the lacy brocade image I used a product that Stampin' Up doesn't carry: INKA GOLD ink...it is much like a cream eye shadow and can be applied with one's own finger tips and it is such FUN stuff. I applied just a bit over all the surface of the card to get this wonderful shimmery silvery glow as I used the silver cream not the the gold cream. I then edged the edges with a fabulous SU soft suede ink spot to get a very vintage and distressed look! I was SO excited about the card backing and then I turned my thoughts to the sentiment. My Sale-a-Bration order is on it's way as we speak and in it I got for FREE the Sentiments stamp set with that fabulous sentiment " Celebrate". I looked through my massive collection of SU stamps and found the stamp I had that best captured the feel of the sentiment set! I decided to use the Thank You stamp from my wood mount "Fresh Cuts" which is an SU set from a few years back when wood mount was still a popular choice. I put aside for later and went to create my embellished sentiment piece.

I took my espressso SU marker and outlined the label image from the Layered Labels set 2/2. I left the  Congrats sentiment uncoloured as I wanted to stamp Thank You from fresh cuts in rose red from the subtles collection. After stamping the espresso frame, I cut it out using the framelit from Apothecary Accents. I then stamped the Thank You in rose red and a little off centre as true vintage things are never ever perfect. I used my soft suede ink spot to distress the edges of the label and then put two SU rinestones in the middle of the flourishes on the sides! I popped on this little piece with dimensionals! And Voila: a lovely card that captures the sale-a-bration stamp set, highlights the lacy brocade folder and uses one of the great framelits and one of the great edgelits that SU has for sale! I hope you love this card as much as I do and enjoyed learning how to make it!

~Happy Stampin'~    Jenny G

Saturday, 5 January 2013

SR #157 Not Quite Navy/Crumb Cake/Soft Suede/Very Vanilla

Hi All,

Here is my card for the Stampin' Royalty Challenge #157!

I used Not Quite Navy ink on the Eiffel Tower image from the SU stamp set Artistic Ethchings, and then blinged it up with some SU dazzling details. Using my retired SU tearing edge I made a fabulous edge and then smudged all the edges with Not Quite Navy, Soft Suede, and Crumb Cake. The paper underneath is leftover from the Beau Chateau designer paper series which also has the browns of soft suede and crumb cake in it as well as a lighter shade of blue that I thought complimentary. I also edged the DSP with all the inks. The base layer is SU Whisper White paper that I ran through the Big Shot with the Square Lattice impressions folder. In th right corner, I have used an antique brad and in the lower left corner I used two SU rhinestones to accent the piece holding the sentiment. For that piece, I used the smallest of the label framelits and then stamped AMOUR in SU white craft ink. I then put on clear powder and set it with my heating tool. When done I took my Not quite Navy inkpad and smudged from the centre out to create that dynamic streaking that you can see if you look closely. The ink just rolled off the sentiment which shows up nicely against the streaky background. I used 5/8 whisper white organza ribbon to add an extra touch. Hope you like my latest creation. Happy Stampin'!

Jenny G

Valentine's Day & Birthday Cards & Recent News!

Hi All,

It's been a while since I blogged last but I am back again. The past year was difficult with my dad passing and our neighbour flooding our place but I am so glad that the house is repaired and things are getting back to usual. Missed my dad so much over Christmas but I guess that that is pretty typical for most people. Anyways I have a few cute cards/projects to show you all and they are relating to one of my favourite days of the year: Valentine's Day! I have not submitted them to any challenges. The first card is for my hubby and I made it earlier in the year.


The second card is based on a card at a make and take at the Making Memories Scrapbooking Shop. I totally blinged it  out with rhinestones, glitter glue and a fab stamp from Stampin Up's Stamp Set Affection Collection. I stamped the word LOVE and highlighted it with SU dazzling details! I also used the Cupid from SU's Valentine's set ps. I Love You.


The last card is a gorgeous card I just made for an upcoming birthday!


 By the way, I said I would put a shout out to my card making friend Sherry! She has started a card shop on facebook so if you want to check out her designs feel free to check her out at  www.facebook.com/shersshoppe

Hope you enjoy! I will be entering more challenges soon! Happy Stampin'

Jenny G

Tuesday, 13 November 2012

SUO #58: Clean & Simple Christmas Cards

Hi All,

Here is my entry for SUO #58! A very clean and simple Christmas card! I figured that using cherry cobbler ink on white cardstock would look wonderful!


I scored the edges on this card with my Simply Scored like I scored the card for the So Shelli challenge on my previous post! Recently I heard from Kellene on that challenge and I was so excited to hear that I won a stampset on that challenge and it is headed my way. I was so excited!

On another piece of whisper white, I stamped the decorative flower from the Mixed Blooms set as it reminded me of a snowflake! I then used my 2" circle punch to punch it out. I re-stamped the image on another piece of Whisper White and took my SU espresso marker and marked an inner circle on the stamp to try and get a rock and rolled effect and then punched the inner circle out with my 1 3/8 circle punch. I used my piercing tool to make a hole to put an antique brad through and used my Dazzling Details to make the inner part sparkly! I used SU dimensionals to adhere the little circle onto the big one and ran my espressso marker on the edge of the big circle and then used more dimensionals to adhere the bigger image on the card.  The sentiment "Merry Christmas"  was from a 2pc. christmas set I bought a few years ago but have forgot the name of. Hope you like this card! Happy Stampin~

Sunday, 16 September 2012

SoShelli.com Creative Challenge: September 9/12

Hi All,
For the So Shelli Challenge we were asked to create a two layer card! SO here is my entry!


 As you can see I used the SU Simply Scored to make score marks around the edges of the base card. I then used a fabulous stamp set I bought last year called "The Open Sea"! I stamped the ledger with soft suede and the sail boat in black Staz-on I bought from Su a while back for a crisp dark image! I had some old Stampin Up grommets that I wanted to use so I placed one in the corner so it would look like a little porthole like a porthole one might see on a ship! I used the Bitty Banners stamp set and framelits to create and accent the sentiment "Happy Birthday". I placed the sentiment on a cute Pear Pizzaz banner, and I trimmed the sentiment so you could see more of the banner.  This is the second layer of my two layer card and it is highlighted by my cute Stampin Up library clip! I stuck on the sentiment with SU dimensionals. Before I placed on my sentiment I took a sponge dauber and sponged the edges of the scored card for a little bit of a vintage look with Soft Suede, Classic Black, Always Artichoke, and Pear Pizzaz. They blended together nicely to make a truly unique look. I have an old garden green inkspot from way back that I think I used as well. Anyways, this is my quick 15 minute two layer card. The first layer is the base and the second layer is the embellishment with the sentiment Happy Birthday! Hope you enjoy!

~ Happy Stampin'
Jenny G

Saturday, 25 August 2012

SUO Challenge #52 Photo Op

Hi All,

My wonderful dad passed away in June 2012 and I started making a memory page for him this week and thought I would submit it to the SUO Challenge #52 as it involves a photo.


This page is a tribute to my dad: a man who worked so hard to keep food on the table and a roof over our heads when I was young! I miss my dad so much! Anyways all of the supplies (cardstock etc..) are from Stamping Up. The paper for page and for the rossette were from the Beau Chateau collection. The blue cardstock underneath my dad's funeral card was from the in colours 2011-2013. Used one of my all time favourite retired SU punches for the black border around the funeral card and rosette. Then crimped it! Even the big silver brads (5/8 neutrals assortment) in the corner are from Stamping UP! It was back in the day when brads of all kinds were cool and the crop-a-dile was king! Felt good to use some retired SU products for this memory page!  The white butterfly is from the Beautiful Butterflies Big Z Die and the black one from the Beautiful Wings Embosslit. SU rhinestones on the butterfly and a nice SU button on the rossette make this page a beautiful page to look at. Thanks for letting me share this page with you as we remember my dad!

Saturday, 18 August 2012

SUO #51 Designer Papers

Hi All,
Just a quick post and a quick card today as I am heading out for a birthday party! Yippee! In fact, I just spent the past few minutes making this card with my favourite SU DSP! Since the challenge is about designer paper I decided to make the designer paper the focal piece! The base of the card is naturals cardstock with a Sizzlits Large Paper Doily pressed out on pear pizzaz paper. I then ran black SU cardstock through a crimper and punched with a retired SU punch~but one of my favourites still! I put my DSP on top of a panel of brown SU textured cardstock and tied a little crumb cake ribbon around it. I used the bitty banners set to make that adorable banner. Stamped the happy birthday sentiment then trimmed it so the pear pizzaz banner would be big enough to show. So adorable! A little SU library clip and some buttons from the brights collection make this a great little card and show off the Designer Series Paper Very well! Hope you enjoy! Happy Stampin'

Jenny G

Thursday, 2 August 2012

SUO Challenge #50: Buttons & Brads


Hi All,

I was meaning to enter this challenge sooner but life got so busy...anyways I decided to decorate a Stamping Up Kraft Box with one of my favourite SU designer series papers! I used a retired punch to make the scallop ribbon from black and cherry cobbler cardstock. I put the black cardstock through a crimper to get that delightful texture. Victoria 5/8 ribbon is underneath with a nice button from the SU regals collection topped with one of SU's adorable antique brads. On naturals cardstock I stamped out the sentiment "Just Because" from the "It's Your Day" stampset on cherry cobbler classic ink and punched it out with the modern label punch and edged it with cherry cobbler ink and set it with two clear rhinestone brads! Buttons & brads are so front and centre in this creation and I just LOVE it! On opening the box, you can see more of my favourite DSP and a flourish from the stamp set "Artistic Etchings" stamped in cherry cobbler ink on natuals cardstock and punched out with my other SU label punch which I have forgotten the name of....and wait when you open the box you see a mix of buttons and brads as little gifts strewn across crimped paper. There are subtle and bright glimmer brads and buttons from the neutrals and regals button collection. Hope you like this project which is all about buttons and brads. Happy Stampin~


Jen

Monday, 2 July 2012

Stampin Sisters in Christ Challenge #146

Hi All,

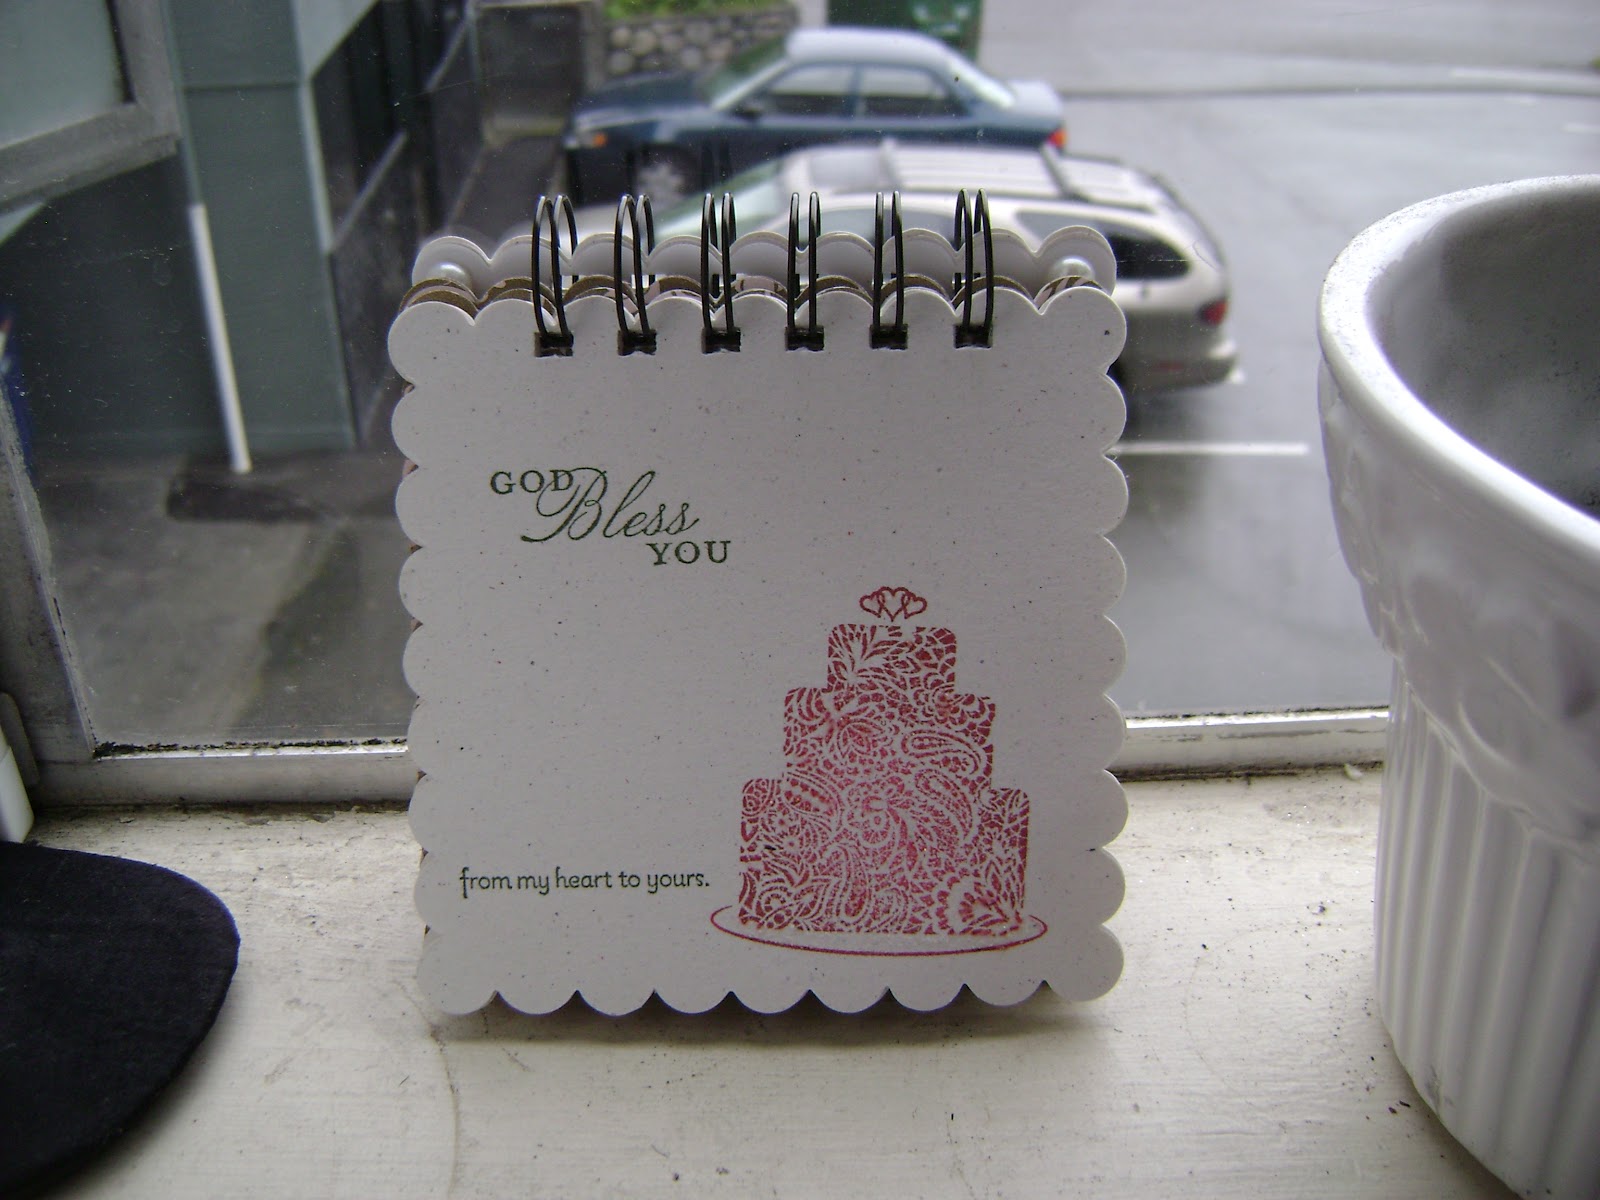
In my previous post, I entered a memory book for my cousin's baby that I just made last week for his first birthday! In this post, I will showcase the memory book I made for my sister-in-law two days ago who was married in march...I have had a lot going on with family so I am a little behind on my crafting projects!!  The new thing I am using is the Zutter machine! I have never used it before but was so amazed at the result!This project is a chipboard memory book covered with Beau Chateau Designer Paper from Stampin'Up! The binding at the top was done with a Zutter machine. Hope you enjoy this project! I have a very full description of how to put together this book in a previous post. So if you want to try and make it at home yourself feel free to look at the earlier post to get detailed instructions! Since this challenge is about love and especially God's love I thought this project would be very appropriate! The first picture is the front of the memory book. When you flip the cover and stand it up you see the back which is decorated with that dark pink flower and 3mm pearl! Nice looking from back to front. Once the cover is lifted and it is standing up you can see the first page which is actually two pieces of paper that are layed over each other. The first sheet is vellum which I put in the laser printer and printed out the info for the wedding. I pressed out a whisper white square underneath which was stamped. The vellum and the white paper are glued together at the corners with glue dots with pearls over top to hide the glue dots. There are lots of pages in this memory book so I only took pictures of a couple of the other pages. Hope you enjoy! Happy Stampin~
Jenny G


Supplies Used:
Dies & Sets:
Large scallop square die SU
Blossom Punch SU
Mixed Blossom Stamp Set SU
Trust God Stamp Set SU
For the Bride SU
 Zutter Machine

Inks:
Always artichoke SU
Regal Rose SU
Soft Suede SU
Pretty in Pink SU

Paper & Ribbon:
Soft Suede Taffeta Ribbon
Beau Chateau DSP SU
Whisper White SU
Naturals Paper SU

Sunday, 1 July 2012

SUO #48 "For the Birds"

Hi Ladies,

It has been a hectic month for me and I have FINALLY started catching up on some of my personal projects over the last week! I had been planning to make some small chipboard memory books for various family members and friends. I made a wedding book for my sister-in-law who was married in March 2012 and will send it soon. The second chipboard memory book is for my friend Dawn who had her baby in December 2011. The third memory book is for my cousin Carmen who had her baby in July 2011. I just received an invite to the baby Liam's first birthday and realized I HAD to finish this memory book soon! When I saw that the SUO challenge was about birds I was so excited as this memory book features a bird on it's cover and on the inside. I hope you enjoy this cool SU project. The only non-SU element was the coil binding on the top that was placed using a Zutter machine. Since SU doesn't have anything close to a Zutter machine, I figured it would be okay for this challenge.


The chipboard was SU chipboard pressed out on my SU Scallop Square Clear Die, and the paper on top (Su DSP Beau Chateau) was pressed out as well and glued on with tombow. while my Big Shot and die were out I pressed out several scallop squares on SU Natural paper. I then took out a long piece of SU Whisper White 5/8 organza ribbon and secured it down with SU sticky strip. I then punched out two circles on whisper white paper with my 2 inch SU circle punch. On one I stamped an elephant in Pear Pizzaz Classic ink. On the other I stamped out an owl from the set Punch Bunch which was an old sale-a-bration set with Soft Suede classic ink. I took my blush blossom marker and coloured in the owl's beak and the circles around his eyes. I then stamped out the same owl in pear pizzas and used my 1/2 inch SU Circle punch, and then carefully trimmed around the eyes. I took a dimensional and cut it in fours and place one small piece under each eye and then threw one little piece away. I pressed out a leaf and branch from my little leaves sizzlit and trimmed it so there was enough of a branch for the owl to sit on. I then glued the leaf down  with my two way glue pen. The other little piece of a dimensional that I kept I placed under the leave that is hanging outside the white circle. On the flip side, I took the 2 inch circle with the elepahnt and popped it on dimensionals on the flip side of the from cover with the owl on it. On the inside, I took a piece of SU vellum paper and used my laser printer to print out the info on my cousin's baby. I put that through the Big Shot with the Scallop square die, and then cut out another scallop square on whisper white.
On the white scallop square I stamped another owl in pear pizzaz from Punch Bunch, and then the Giraffe from the retired set Animal Stories. On alternating pages in always artichoke ink I stamped alternating owls and giraffes on the naturals paper. I put the book together in the right order and then used the zutter machine to bind the memory book with the help of a wonderful lady Amari at my local craft store. Later I placed a tiny glue dot in the corners and matched the vellum and white scallop square together and place 3mm pearls from the last mini- catalog in the corners! I hope you love this little memory book as much as I do. Have a great day and happy stampin~

Jenny G

Saturday, 2 June 2012

SR # 126 Masculine Cards

Hi All,

I took a break from making cards for a few days as I had spent so much time making my Guest Designer Card for Stamping Up Online Challenges! (SUO Challenges #46 Big SUmmer Days). I loved that adirondak chair I made so just look at the post previous to this one if you want to learn how I made it! Anyways, I made a special card a couple of days ago for my step-son Steve who was not only having his birthday but graduating too! I wanted to make a card to cover both events with the theme of celebration or celebrating. I loved the card I made but I think he loved it more!!! The graduation and birthday party went well, and today I made prime rib for dinner with yorkshire pudding! (I did serve veggies as well~never fear!) We all had a great supper!


Anyways, let me tell you about how I made this card!!!! The paper was SUO paper of course! I LOVE all SU DSP (Designer Series Paper). If you look closely at the DSP paper you will see little crowns in the paper that are EXACTLY the same as the crown stamp in the Artistic Etchings set which I used to make the crown. I stamped the crown, the sentiment and the flourishes in Cajun Craze Classic ink, and used some 3mm pearls from the last mini catalogue! I stamped the crown separately and carefully used my paper snips to cut it out. It is posted on SU dimensionals. The pear pizzaz ruffed ribbon was also from the mini catalogue, and the ribbon behind it is SU seam ribbon but am not exactly sure which one as it was in my drawer of SU ribbon scraps!

The frame for the sentiment and crown is a scrap from a nestabilites die I had used from a friend once upon a time and found it sitting in my scrap paper drawer. I used it as it fit the card better than the SU Label Framelit set....I used my blushing bride smooch from the last mini catalogue and my log cabin smooch sprits from the main catalgoue from last year as well to colour the frame behind the sentiment. I kept spraying over and over to get that rich, concentrated colour! The Celebrate Stamp was a gift from a friend of mine so I am not sure if that one is SU or not! Anyways, I loved making this masculine card to celebrate Steve's birthday and graduation. I made this card mainly from scraps and I LOVE it! I recommend that people organize their ribbon, card, paper, and DSP scraps as you never know when inspiration will strike!

~Happy Stampin'
Jenny G

Friday, 25 May 2012

SUO Guest Designer Challenge Entry

Hi All,


Here is my entry for the Stampin' Up Online Guest Designer Challenge! The topic is SUMMER and when I think of summer I think of vacations, camping, and relaxing so this card was inspired by all of my favourite summer passtimes!

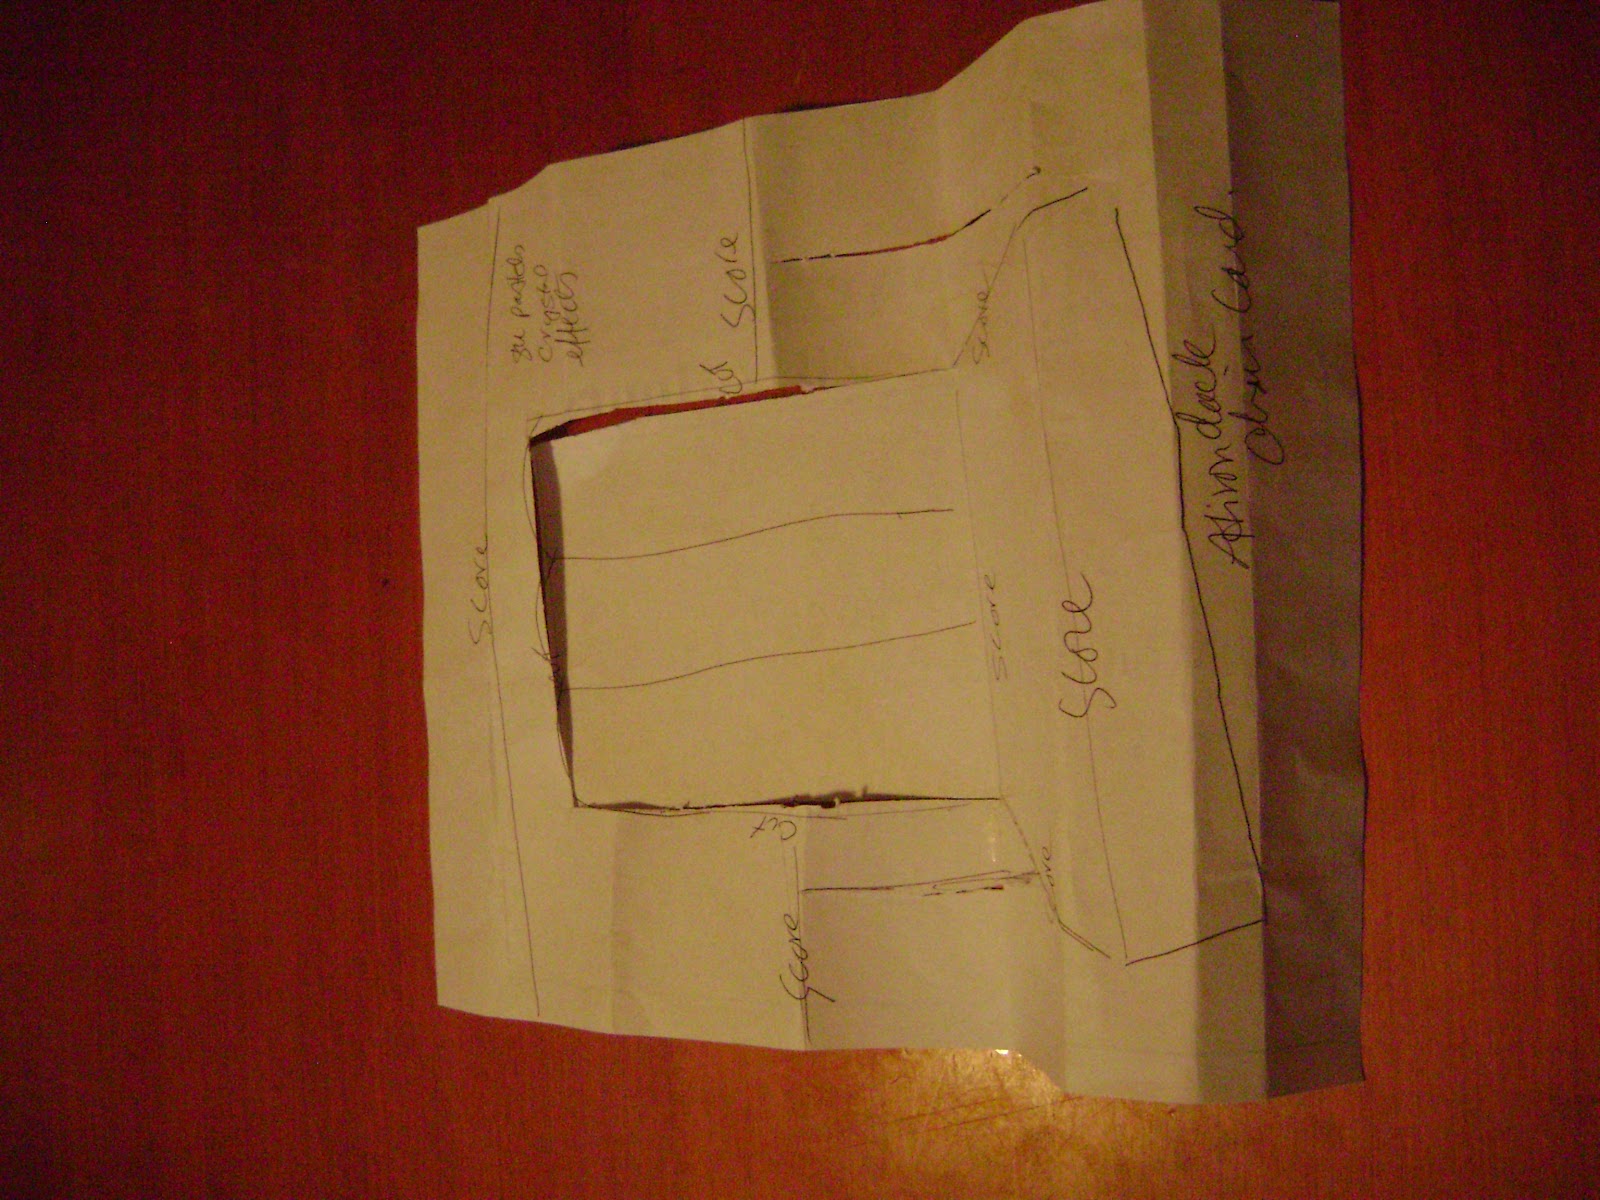
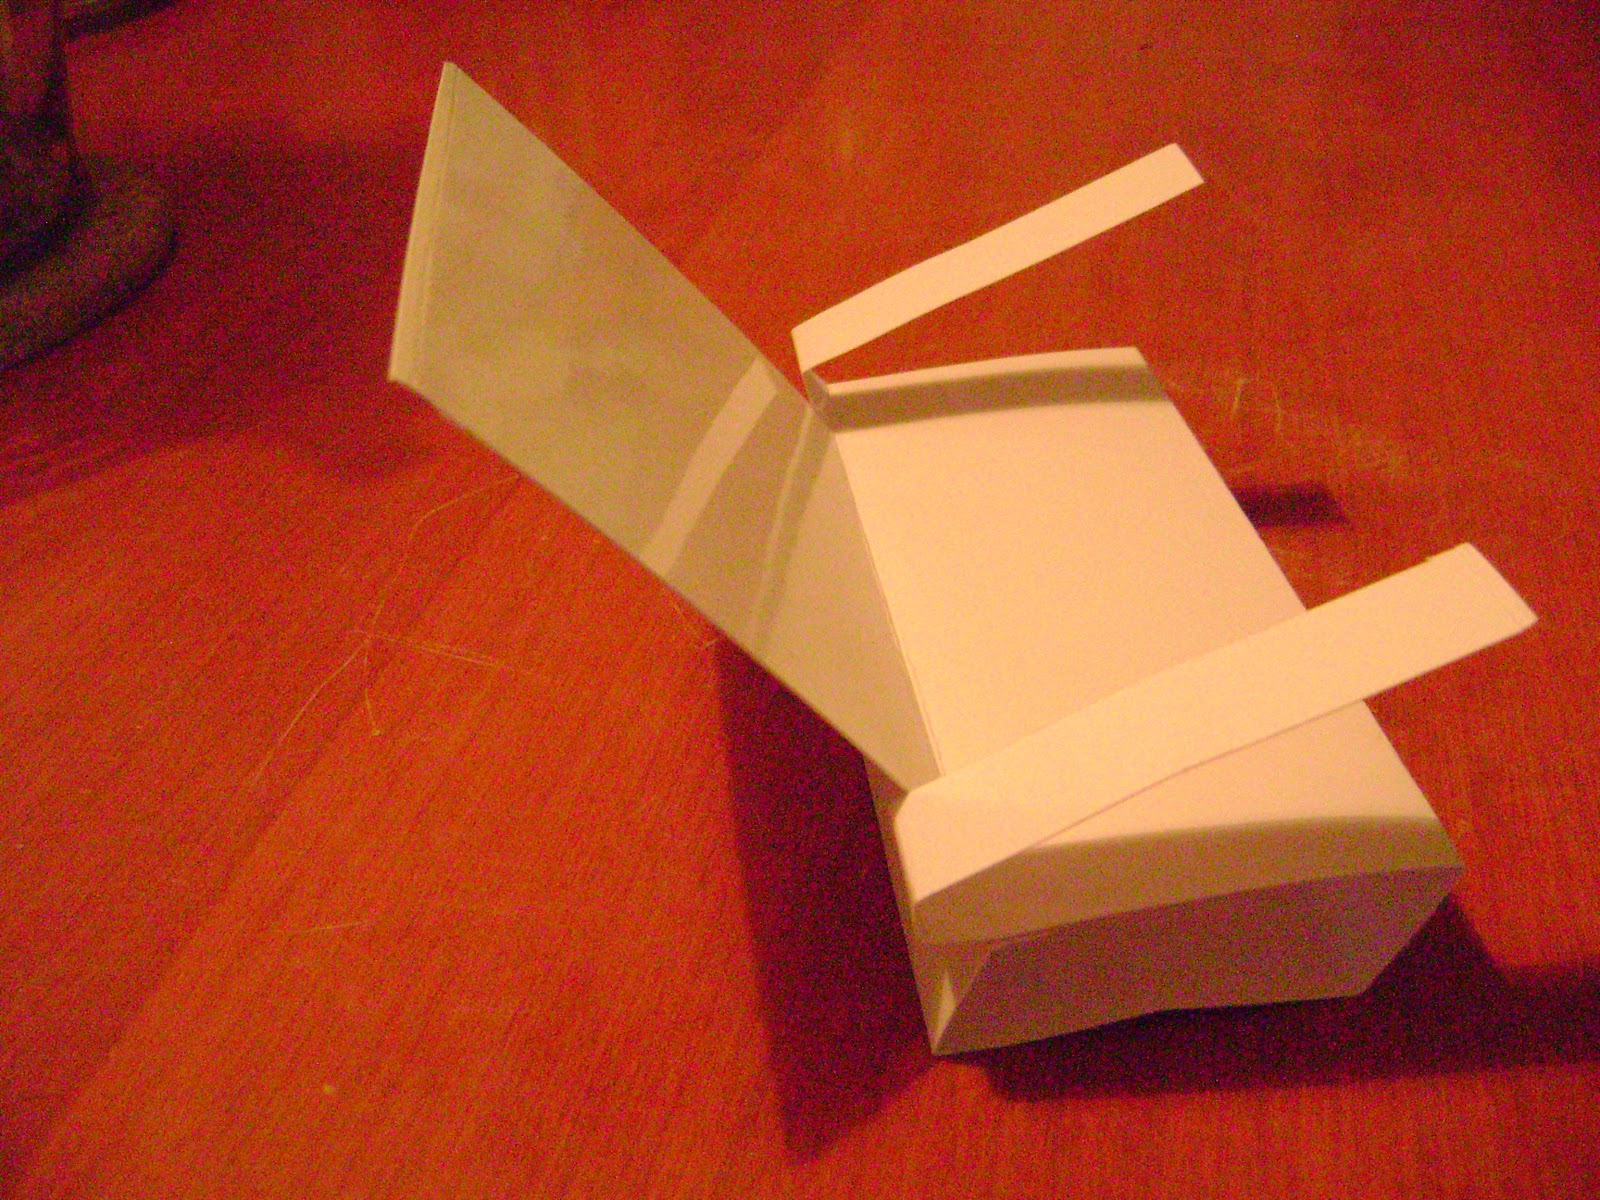
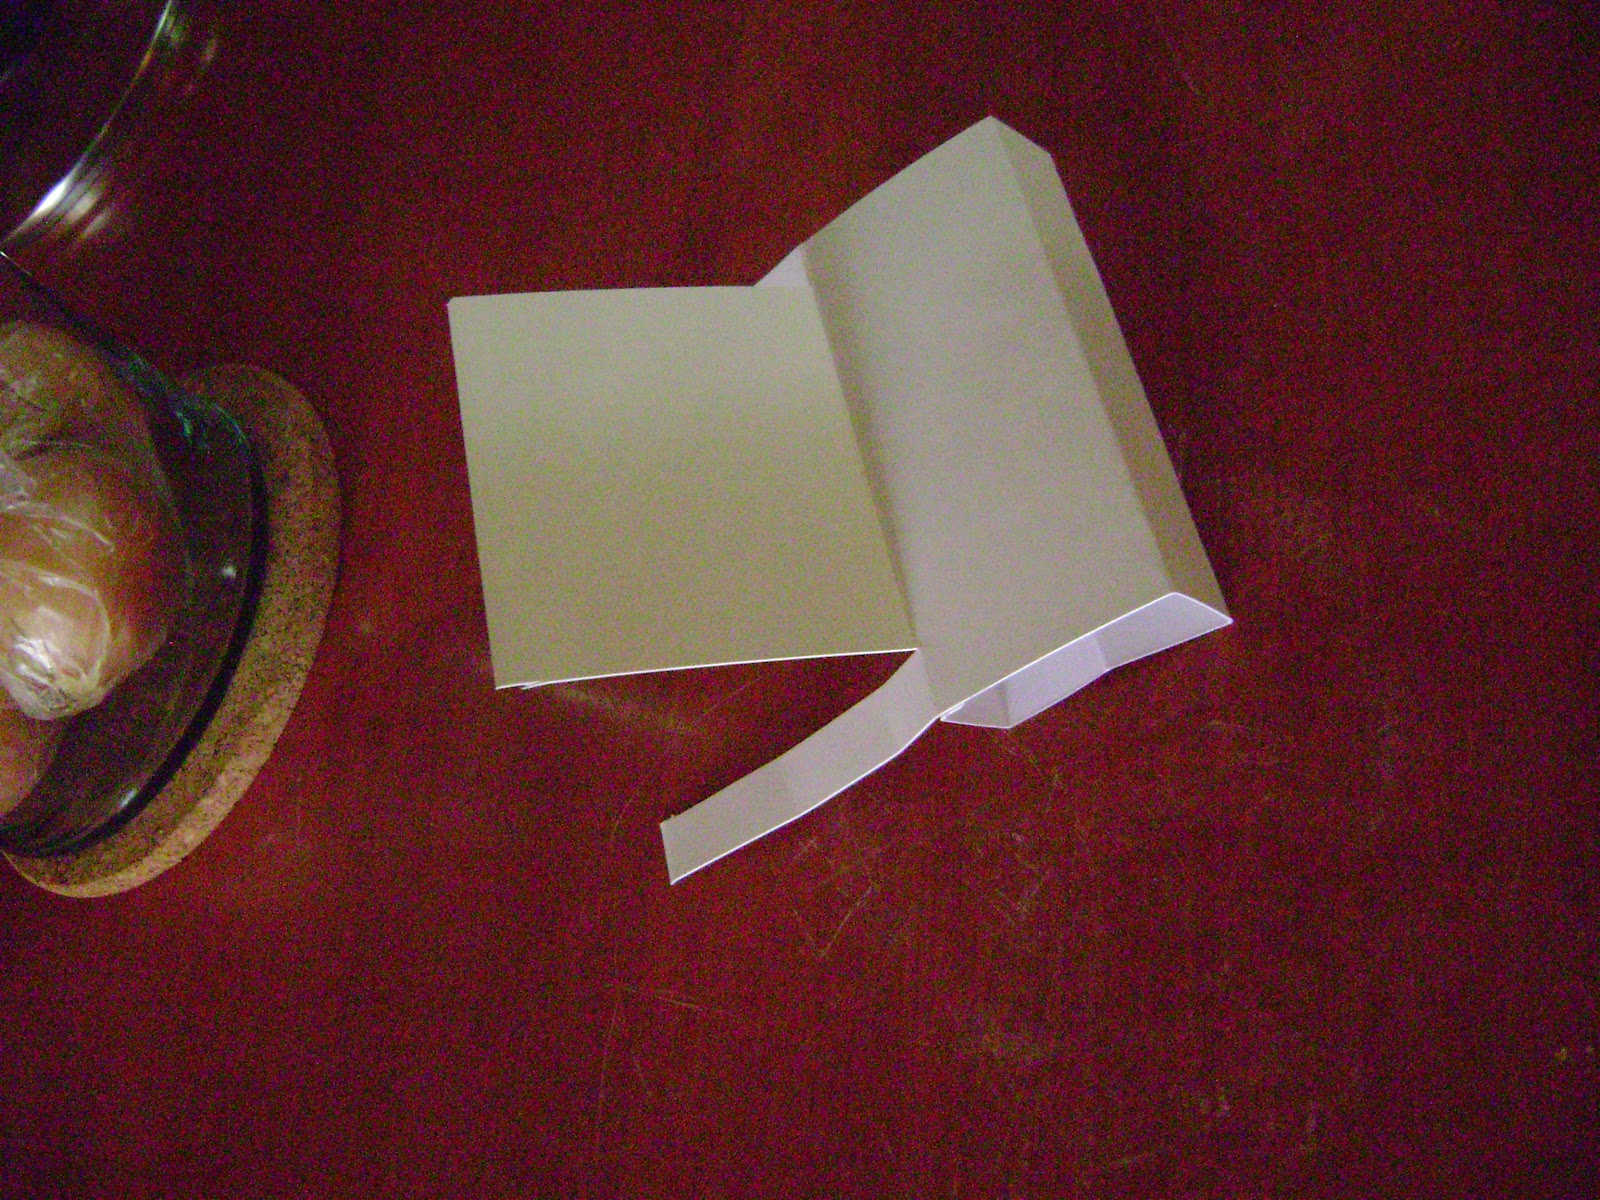
I made the adirondak chair first from a quick sketch I did at work on some scrap paper! When I got home I took a piece of SU glossy paper as it is stiff enough to bend into any shape I have EVER wanted to make for a card.


 I then ran some SU paper through my Big Shot with one of the SU texturz plates. I used an SU brayer covered in River Rock craft ink to ink the plate. You can find the SU Texturz plate I used here in the 2010-2011 SU Idea Book and Catalogue on page 215 at the bottom. It is one of 3 double sided plates in 6 designs! I LOVE these plates as I love all the plates in Kit #4. I am not sure if these plates are retired or not, but if they are not I suggest that EVERYONE buy Kit #4 as the effects of all of these plates are just fabulous! I used a crease pad and it was hard to push through the SU Big Shot but the effect it made was lovely. I then cut the paper with my SU craft scissors into the shapes I wanted and  used my SU corner rounder to round the corners out on the chair back. The paper I put through the Big Shot was left over from another SU project so if you look closely you can see the edges of the framelits used with the cutting side up and scratches made with my SU paper piercing tool. I used Soft Suede on a SU sponge dauber to spread that lovely brown colour on the chair and I also just took my Classic Soft Suede pad and pounded it down hard on a few spots to get that darker concentration of colour. I also ran the edges of the chair on the ink pad hard to get that darker, crisp line.

On SU Naturals paper, I stamped some trees from the "Lovely as a Tree" stamp set. I used Pear Pizzaz and Always Artichoke classic ink for the trees and then out lined a few trunks with my SU espresso marker.  To stamp out the checkered blanket underneath I used the "Solid Stripes" wood mount stamp with Cherry Cobbler and Always Artichoke ink. This layer was tombowed down onto brown SU textured cardstock from my neutrals assortment! The flower in front of the chair was cut out from my newest SU flower punch on Beau Chateau paper. I used more soft suede ink to stamp out the sentiment from the "Tea Shoppe" set and then used my small scallop punch to punch it out. The leaves are from a sizzlit called little leaves. Hope you enjoyed learning how I made this adorable card. Must head off now! Take care!  ~Happy Stampin'

Jenny G

Monday, 21 May 2012

SUO Guest Designer

Hi All,

I have just finished my entry for the SUO Guest Designer Challenge and am waiting to hear from Robin M. as to when I can post the pics of my fabulous card! I will post it as soon as possible! I just love my card as it is a 3D pop up card with a summer theme....everytime I look at the card I feel so relaxed! This card will definitely be hard to give away! Maybe it will stay in my collection forever! Wait for the card recipe and the pics as they are coming soon! In the meantime, Happy Stampin~

Jenny G

Thursday, 26 April 2012

SUO #43 Mini Occasions Catalogue

Hello Ladies!

Here is a card I whipped up using the label framelits on SU pear pizzaz paper. I stamped the image using the Apothecary Art set and the sentiment from the All Occasions set. First Edition DSP is behind the framelits backed by white and black cardstock. The Apothecary Art image was stamped on SU glossy paper to give it extra shine. The ribbon is SU ribbon and the bow is made using a salad fork. Hope you enjoy!

~Happy Stampin'~

Monday, 23 April 2012

Birthday & Mother's Day Cards

Hi All,
It has been busy with church and family over Easter, and now I have finally settled back into work and back into my crafting. Here are some cards that I am working on for an upcoming ladies retreat at church.


I will put up more samples and ideas as they happen. These cards could either be Mother's Day cards or Birthday cards! I just LOVE the rhinestone buckles! I have used some discounted DSP (Designer Specialty Paper) and some rhinestone buckles from a local craft store. I also used some SU (Stamping Up) ribbon and the Tea Shoppe stamp set from the mini catalogue! I also used the label framelits from SU to make the panel for the sentiments to sit on! Hope you like these little gems. If you are coming to the retreat you will learn more about making cool cards like these as well as how to make a super, cool glittery gift box!
~Happy Stampin'~ Jenny G

Friday, 23 March 2012

SUO #41 Challenge Spring


Card # 1
Cardstock:  SU Whisper White
Ink: Su Basic Black
Score Marks with Simply Scored
Ribbon: 5/8 Whisper White Organza ribbon
Stampsets: Kindness Matters/Nature Walk/All Holidays
SU Dazzling details on the middle butterfly


Hi Ladies,


 I love these cards as I think they capture the season of spring. Since Easter is in Spring and I have been making some Easter cards for family I thought I would continue with the Easter theme. The first card is a clean and simple card and I made it in under 10 minutes. I wanted to learn how to use my Simply Scored tool so I just started scoring whisper white cardstock and kept playing until I had two cards I liked. On card #2, I used my brayer again with that wonderful pear pizzaz ink and my Simply Scored tool! It was such fun. I decided to put the "recipe" for the card under each card as I have seen on a few other sites...if you want more details just leave a comment and I would love to tell you all the nitty gritty details! Hope you enjoy! Happy Stampin~


Card #2:
Score lines with Simply Scored
Ink: Pear Pizzaz brayered on the background
Regal Rose and Pear Pizzaz rock and rolled on the NOTE
Butterfly from Kindness Matters in Regal Rose
Daisies from Upsy Daisy stamped in Regal Rose and then restamped Early Espresso to give a fuzzy gentle look.
Embellishement: 3mm Pearl
Ribbon: Blushing Bride and Pear Pizzaz pleated satin ribbon
Pretty in Pink Seam ribbon under the Blushing Bride pleated ribbon
Stampsets: All Holidays/Upsy Daisy/Notes & Details

Thursday, 15 March 2012

Stamping Royalty #115


Just heading out for a walk around the park but thought I would post this card I made today! I used one of my retired SU texture plates from the #4 collection of plates...and it looks like bark or wood...then I brayered it with the sahara sand colour. I used ivory naturals SU cardstock. The two pieces of SU cardstock underneath the framelit are nice accents. The plum colour I sponged with soft suede and the natural ivory piece was torn with my SU tearing edged and smudged with Marina Mist. The butterflies from the kindness matters set are stamped with the main colours for this challenge. The top row are inked in Sahara Sand. The middle row are inked in Marina Mist, accented with dazzling details and 3 small pearls. The piece with the Marina Mist butterflies is popped on dimensional. The bottom row is inked in Soft Suede. The ribbon is SU Very Vanilla seam ribbon. The framelit piece is spritzed with Log cabin smooch spritz, and the sentiment Happy Birthday is from the occasional quotes set, punched out with a label punch and inked in Marina Mist. Hope you enjoy! Happy Stampin'
Monday, 12 March 2012

SUO #40 2nd entry


Hi All,

Here is my second entry for SUO #40! I used some green DSP given to me from a demo and some of the DSP I bought last year from the SU Botannical Gazette DSP being sold. I so love that little bee on the paper! I decided to make a birthday card for a friend and wanted to showcase green.There is a piece of rich razzleberry paper behind the green DSP so the green DSP stands out more! I LOVE  the green DSP and the green seam ribbon. I punched out that little bee from the Botannical Gazette DSP and put under one of the beveled window panes I bought last spring! I used an SU mini clothes pin to hold up the Happy Birthday which has that new pink ribbon under it and another piece of green seam ribbon under a piece of textured card stock. I left the edges a little raggedy as nature is never perfect..there is always variation.  The cardstock used for this card is the Naturals Ivory and I stamped the bird from Nature Walk inside...hope you enjoy!